TABLE OF CONTENTS
What is the Illuminate Integration Gateway?
The Illuminate Integration Gateway, also called the Dataport, is a tool used to provide the Illuminate platform with access to data that is located in physically and logically secure configurations, such as behind a firewall in the organization’s data center. The Integration Gateway provides a secure, encrypted channel to transport this data to the Illuminate cloud environment, where Illuminate creates a secure Application Program Interface (API) access platform.
How it works
N2N provides a Docker container that runs Illuminate's Integration Gateway (IIG). This is installed on a Virtual Machine (VM) that is provided by the University and typically hosted on the University's network. The IIG is used to facilitate secure communication between the University database and the Illuminate Platform without having to allow direct external communication to the actual database. VM setup is operating system specific, please refer to your onsite System Administrator for VM setup.
What is the current version of the Integration Gateway?
Illuminate Integration Gateway is at Version 4.14
*Note: Prior versions of the Illuminate Integration Gateway were branded "Illuminate Dataport"
What do we provide?
N2N provides a Podman image with the following software packages included:
- Tomcat 9.0.20
- JVM 11.0
- Illuminate Integration Gateway Project 4.14 (the N2N application code)
General System Requirements
General system requirements for installing the Integration Gateway:
Software
Podman
Hardware (VM)
4 to 8 CPU Cores (processors)
8GB to 16GB RAM
Enough disk space to run the OS and other supporting software (recommended disk space 40+ GB)
|
Prerequisites
An SSL certificate ready (self-signed is not supported) which includes .crt file (the .crt file must have the public, root, and
intermediate certs, with public cert on top of the file) and a private key.
Ports 443 need to be open on the VM instance where Docker and Integration Gateway are installed
Firewall rules need to set up by this time. Whitelist N2N NAT IPs below
. QA: 23.20.165.255 PROD: 54.204.165.208 |
What is Podman?
- Podman is an open source Open Container Initiative-compliant container management tool from Red Hat used for handling containers, images, volumes, and pods on the Linux operating system, with support for Mac OS and Microsoft Windows via a virtual machine
Installation
| Note: This installation applies only to RHEL 7. x + versions only |
Login to the VM instance as root
- Update the default packages on the server
sudo yum update -y
- Install Podman on the server
sudo yum install podman /* then verify the displayed output and enter "yes" */

- Verify the Podman installation
podman version

Installing The Integration Gateway
- Logging into the Illuminate app
- Login into QA Illuminate app: https://qa.illuminateapp.com/api-universe/login
- Login into PROD Illuminate app: https://illuminateapp.com/api-universe/login
Note: If you do not have an Illuminate account please contact appsupport@n2nservices.com
Goto “Connections” tab and Add integration Gateway

Click on the IIG Container Key(on Top right corner) tab and use those credentials to download IIG Podman images

podman login -u='n2n_iig' -p='xxxxxxxxxxxxxxxxxxxxxxxxxx' quay.io
Once you get the success note then lets pull the required images from quay.io
podman pull quay.io/n2ndevops/illuminatedataport:4.14
podman pull quay.io/n2ndevops/illuminatedataportnginx:1.24.0
Next, create Podman network in order to establish the communication between Nginx and dataport(IIG) containers
podman network create n2n_iig

Run Podman containers
podman run -it --name dataport -d --network n2n_iig quay.io/n2ndevops/illuminatedataport:4.14

podman run -it --name nginx -d --network n2n_iig -p 443:443 quay.io/n2ndevops/illuminatedataportnginx:1.24.0

Now copy all your SSL certificate files (such as the .crt and .key files*) to the “certs” folder inside the Nginx container
podman cp <your file name>.crt nginx:/certs/<your file name>.crt
podman cp <your file name>.key nginx:/certs/<your file name>.key
Update the default.conf with appropriate details
podman exec -it nginx bash

vim /etc/nginx/conf.d/default.conf

Note:
|
Test nginx configuration
nginx -t

Restart nginx

Run the status API

Login to Illuminate account again and then go to Connections > Add integration Gateway>Establish Connection tab to continue with this process

Provide the URL/DNS where the Integration Gateway is connected/installed. After providing the URL, the user will then click on the Validate button, which will verify the host connection and installation of IIG via Illuminate application

Upon successful validation of the URL, confirming both the host and Integration Gateway installation, the subsequent screen will be displayed

- Once you click on 'SUBMIT' the url will be saved. scroll down and click on 'ADD DATABASE PROVIDER' to access a list of database providers. Here, you can the add, edit, or delete providers.


- Once all the information entered in the Provider section above, click on 'SAVE' a popup will appear with the authorization token and copy this token, use it in the below curl format command
- Form the curl command using the below format along with the authorization token from illuminate which is copied and run this formed curl on the server to establish connection between dataport and database
curl -X POST 'http://yourdns/idp/addDBproperties' -H 'Authorization:Token from Illuminate connections page in Step 2' -H 'Content-Type: application/json' -d '{"DBHost": "0.0.0.0","port": "1234","SID": "","ServiceName": "servicename","DBUsername": "username","DBPassword": "***********"}'APPENDIX-1: Integration Gateway setup for PROD on the same QA host/server
If the client wants to set up a PROD integration gateway on the QA host, they need to follow these steps
Create prod integration Gateway Podman container
- Uncomment lines from 34-48 in default.conf file of the Nginx Podman container

Test Nginx configurations
- Reload Nginx configurations
Test the connection using curl. It should “return a response status as not a valid request”. Note that you need to configure the command below to match organizational nomenclature
- Now jump to "Establishing a connection between Illuminate, Integration Gateway, and the SIS Database"
systemctl daemon-reload

systemctl enable container-dataportProd.service

systemctl start container-dataportProd.service

systemctl status container-dataportProd.service
APPENDIX-2: Optional step to autostart the containers after a server reboot
If a server is rebooted, restarted, or start/restart, the Podman must be restarted. To accomplish that automatically follow the steps below
- Create an Systemd service for both dataport and nginx
cd /etc/systemd/system
vi container-dataport.service
vi container-nginx.service
- The systemd service of dataport(container-dataport.service)
[Unit]
Description=Podman Container dataport
Wants=network-online.target
After=network-online.target

[Service]
#dataport
ExecStart=/usr/bin/podman start -a dataport
ExecStop=/usr/bin/podman stop -t 10 dataport
ExecReload=/usr/bin/podman restart dataport

Restart=on-failure
RestartSec=60s
KillMode=none
Type=simple


[Install]
WantedBy=multi-user.target
- The systemd service of nginx(container-nginx.service)
[Unit]
Description=Podman Container nginx
Wants=network-online.target
After=network-online.target

[Service]
#nginx
ExecStart=/usr/bin/podman start -a nginx
ExecStop=/usr/bin/podman stop -t 10 nginx
ExecReload=/usr/bin/podman restart nginx

Restart=on-failure
RestartSec=60s
KillMode=none
Type=simple


[Install]
WantedBy=multi-user.target
- Reload the systemd daemon
systemctl daemon-reload
- Enable the Services, this will create an symbolic link to auto start the Podman container on server boot
systemctl enable container-dataport.service

systemctl enable container-nginx.service
- Start both the services(dataport and Nginx)
systemctl start container-dataport.service

systemctl start container-nginx.service
- Check the status of the services
systemctl status container-dataport.service

systemctl status container-nginx.service
APPENDIX-3: SSL Certs In Dataport/IIG
If a client wants to update SSL certs in Nginx, they can go through these instructions for more details
What is an SSL certificate?
An SSL (Secure Sockets Layer) certificate is a digital certificate that authenticates the identity of a website and encrypts information sent to the server using SSL technology. Encryption is the process of scrambling data into an undecipherable format that can only be returned to a readable format with the proper decryption key.
What are Certificate Chains?
A certificate chain (or Chain of Trust) is made up of a list of certificates that start from a server’s certificate and terminate with the root certificate.
What is SSL Certificate Chain Order?
The SSL certificate chain order consists of root certificates, intermediate certificates, and a server’s certificate. Root CAs are a trusted source of certificates. Intermediate CAs are bridges that link the server’s certificate to the root CA.
There are three parts to the chain certificates
Server Certificate: The server certificate is issued to the specific domain the user needs coverage for.
Intermediate Certificate: Intermediate certificates act as middle-men between the protected root certificates and the server certificates issued out to the public. There will always be at least one intermediate certificate in a chain, but there can be more than one.
Root Certificate: A root certificate is a digital certificate that belongs to the issuing Certificate Authority. It comes pre-downloaded in most browsers and is stored in what is called a “trust store.” The root certificates are closely guarded by CAs.
For an SSL certificate to be authenticated by the web browsers, it must be authentic and issued by a trusted certificate authority embedded in the browser’s trusted store. If your SSL certificate isn’t issued by a trusted certificate authority, i.e., if it isn’t issued by a Root CA, then the connecting device or web browser will continue to check if the issuing CA was issued by a root CA. It will keep going back down the SSL certificate chain order to find the root CA. If it finds a root CA, a secure connection will be established. If it doesn’t find a root CA, then the connection will be dropped, and your web browser will display an error message that reads “invalid certificate” or “certificate not trusted.”
How To Update SSL Certs In Dataport
Ensure you have a private key
Create a full certificate bundle for NGINX using one of the methods below, depending on how your SSL provider delivered the certificates to you.
How To form a bundle .crt file
# Open up a notepad or any text editor.
# Copy-paste the Public cert (public should always be on the top of the file)
# Copy-paste the Intermediate cert
# Copy-paste the Root cert
# Now save the file with the desired name(dataport-test-school-edu.crt) within an extension of     the .crt
# You will have to create a .crt(self-signed is not accepted) file and a private key.
(OR)
Example GoDaddy:
Above gd_bundle assumes both intermediate and rootOther SSL providers with a single intermediate certificate:
Other SSL providers with multiple intermediate certificates:
Additional step if the private key is password protected:
If your private key is password-protected, we will need to make a copy without that password to use on the NGINX instance. If you run these commands and are not prompted for a passphrase, your SSL key did not have a passphrase. If you are prompted for a passphrase, enter it when prompted.- NGINX will not properly restart if the private key is password protected.
- Hence, run the below command to turn the password-protected to a file.
Now you have the bundled cert and private key ready, do the below steps to update these files in the Nginx container:
Step 1:
- Upload the new cert and the key files to the server
- Copy the new files to the NGINX Docker container to the certs folder.
sudo podman cp dataport-test.school.edu.key nginx:/certs/dataport-test-school-edu.keyStep 2:
- Navigate to the below location
podman exec -it nginx bash- You will need to update the following items in the file and save them.
- Modify the ssl_certificate on line 5 (if you are changing the name of the cert than previous)
- Modify the ssl_certificate_key on line 6 (if you are changing the name of the cert than previous) Generic

- Save the changes in the default.conf file
wq!Step 3:
- Test NGINX
- If NGINX does not come back as successful, then do not proceed to the restart of NGINX. A successful output looks like this.
nginx: the configuration file /etc/nginx/nginx.conf syntax is ok
nginx: configuration file /etc/nginx/nginx.conf test is successful
Step 4:
- Restart NGINX
service nginx reloadA successful restart of NGINX looks like below
[user@dataport-test ~]$ Reloading nginx: nginx.
- Exit from the container
exit- Verify that the NGINX container is running
- The output should show two containers

APPENDIX-4: Integration Gateway upgrade using manual steps
Login to the VM instance as root
To pull N2N’s Integration Gateway image from the N2N private repository (quay.io), please enter Podman login credentials that are obtained from Illuminate.
STEP 1) Authorization to Access Integration Gateway Docker Images
- Getting the quay credentials through the Illuminate app
- Login into the QA Illuminate app: https://qa.illuminateapp.com/api-universe/login
- Login into the PROD Illuminate app: https://illuminateapp.com/api-universe/login
Note: If you do not have an Illuminate account please contact appsupport@n2nservices.com
- Get the credentials by following the below steps
- From the left-side menu, select the connection button.
- Next, click the button IIG CONTAINER KEY to the right top corner.
- Copy the username and password within the popup box.

- Run the below command on the dataport server using the credentials above
STEP 2) Find and stop the dataport container
- Use the following command to show the containers running on the podman
The container name can be seen by typing in `podman ps` as below. The column name NAMES will let you know the container name.
STEP 3) Save the previous version of dataport
- This command should be used to take the backup. If your dataport container has an alternate name, put that in place of ‘dataport’.
* Your network name in the below command could be different.
* You can get your network name by inspect command as below(the entry will be in the 'Networks' array - see the image below)

$ podman inspect nginx (nginx is the container name)

Example:Image below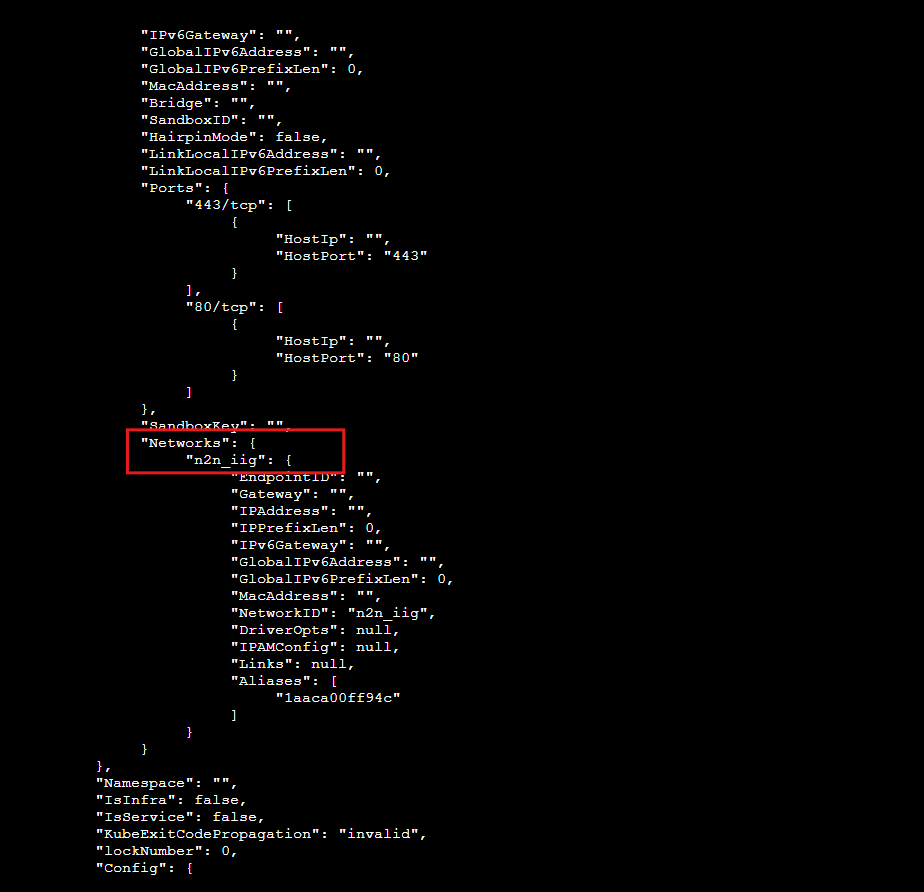
To run this dataport image, the network name 'n2n_iig' should be grabbed as belowSTEP 5: Auto Restart the containers
- Run the below commands once dataport has been upgraded
systemctl stop container-dataport.service

systemctl start container-dataport.service

systemctl status container-dataport.service
Test the connection using curl. It should “return a response status as not a valid request.” Note that you need to configure the command below to match organizational nomenclature
curl -X GET https://yourdns/idp/status
{"status":"FAIL","message":"Not a valid request."}STEP 6) Add Database Credentials.
- To grab the authorization token from the Illuminate app
- Login into QA Illuminate app: https://qa.illuminateapp.com/api-universe/login
- Login into PROD Illuminate app: https://illuminateapp.com/api-universe/login
- From the left-side menu, select Connections.
- From Applied Database Providers select the eye icon(as shown in the figure as option 2).
- Click on GENERATE TOKEN button to the right side of the screen.
- A popup will appear with authorization details that should be copied and used to run the database curl command
Note: The generated token will expire in 5 mins.

Step 6(i)- Create & run the CURL command
- You can use DNS (which is assigned to the Integration Gateway) to add DB properties file
| Database Type | Connection Info |
|---|---|
| Banner/Oracle | {"DBHost": "0.0.0.0","port": "1234","SID": "","ServiceName": "servicename","DBUsername": "username","DBPassword": "***********"} |
| SQL Server | { "DBHost": "0.0.0.0", "port": "1234", "databaseName": "", "DBUsername": "username", "DBPassword": "***********" } |
| SQL Server with no port | { "DBHost": "0.0.0.0","instance":"POWERCAMPUSDB", "port": "", "databaseName": "", "DBUsername": "username", "DBPassword": "***********" } |
| Informix | { "DBHost": "0.0.0.0", "port": "1234", "databaseName": "", "DBUsername": "username", "DBPassword": "***********","informixServer": "" } |
| Sybase | { "DBHost": "0.0.0.0", "port": "1234", "databaseName": "", "DBUsername": "username", "DBPassword": "***********"} |
Step 6(ii) - Create & run the CURL command
- Upon successful connection, you will see the following message
{"status":"success","message":"Properties Added"}Step 6(iiI) - Restart dataport container
- Upon successful connection, you will need to restart the container
APPENDIX-5: Maintenance steps
Podman Containers -Current Status Check
- Look for the “healthy” status on the three containers
- dataportProd
- Dataport
- nginx
Checking Logs
Manual Stop/Start/Restart of a Container
Was this article helpful?
That’s Great!
Thank you for your feedback
Sorry! We couldn't be helpful
Thank you for your feedback
Feedback sent
We appreciate your effort and will try to fix the article